
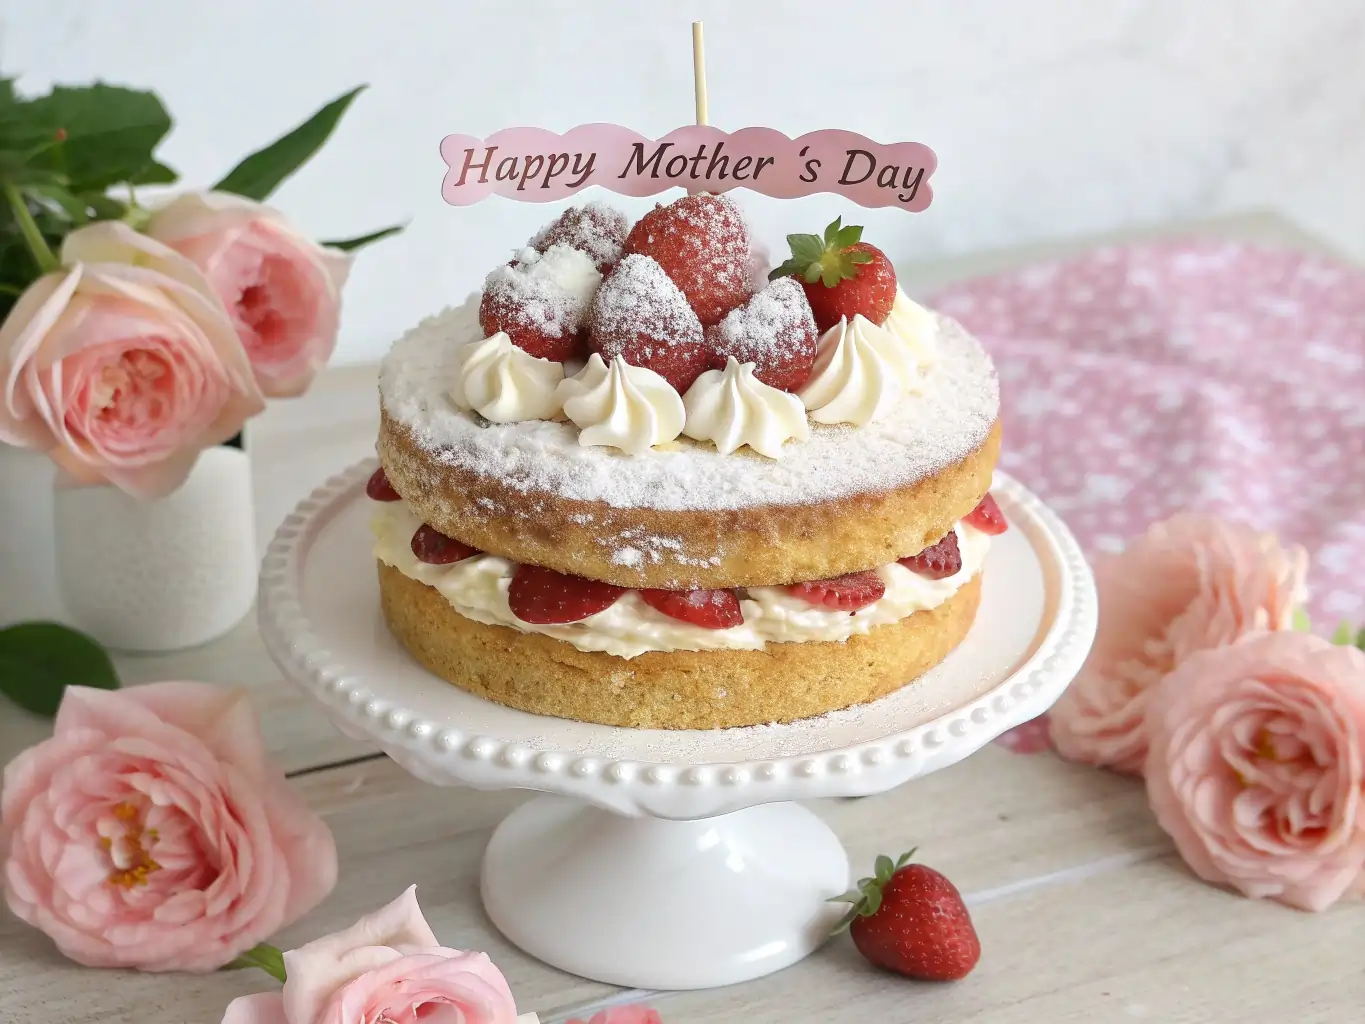
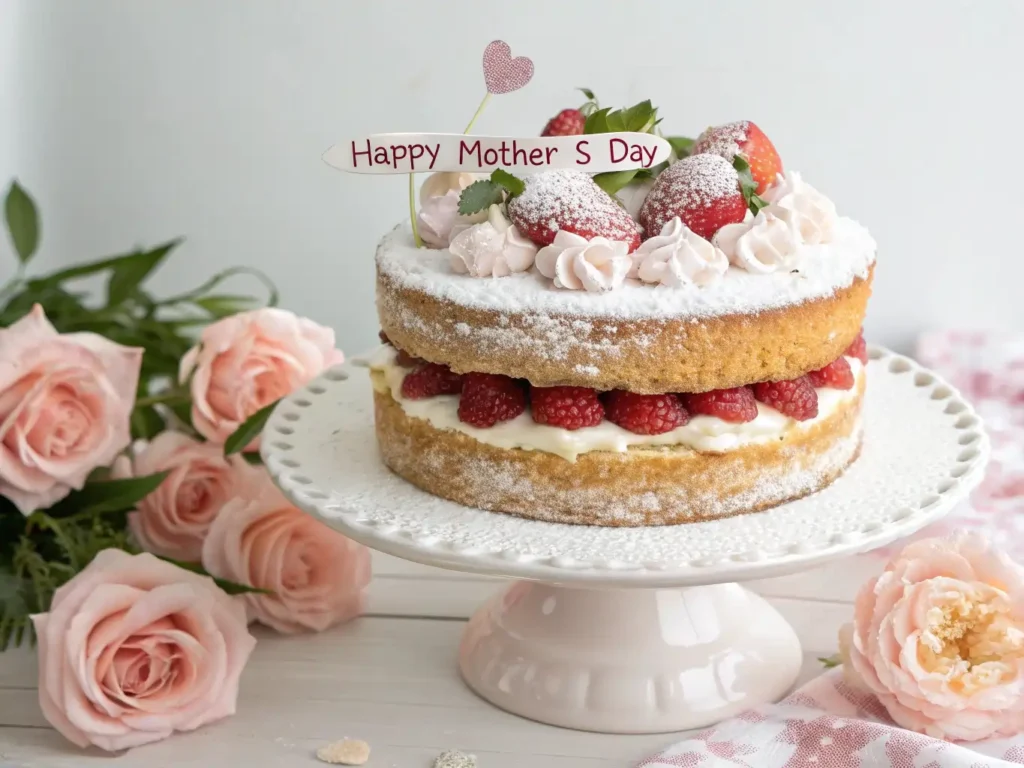
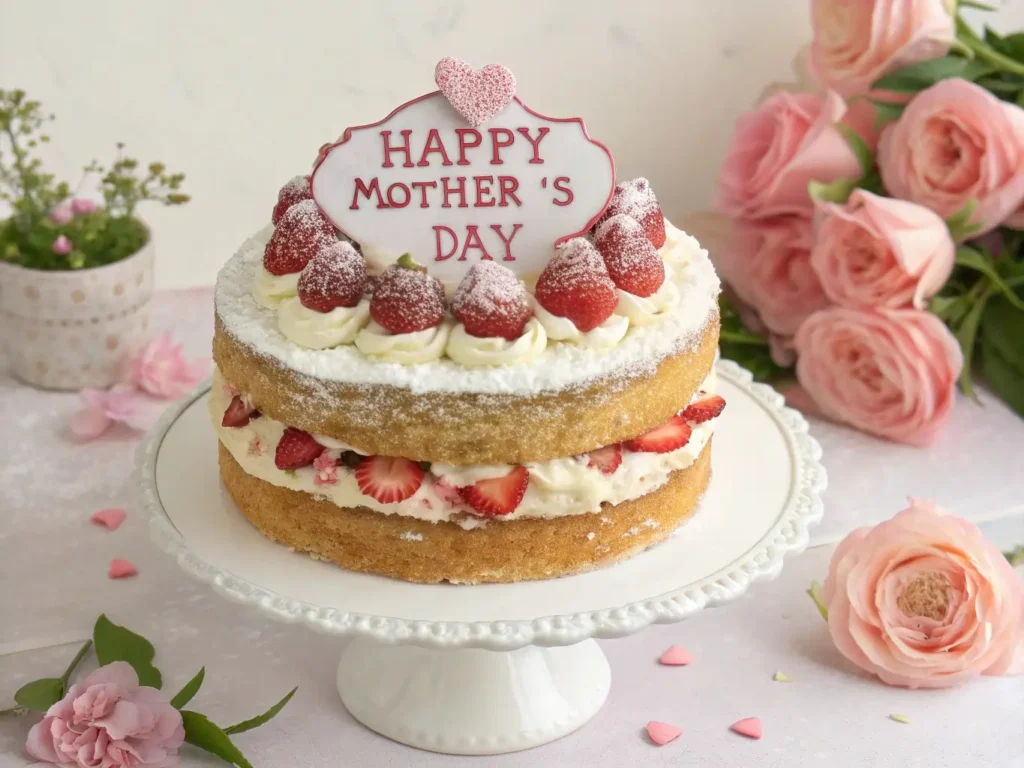
Have you ever wanted to bake something that not only tastes amazing but also says I love you in every bite? This Happy Mothers Day Cake is more than just a dessert—it’s a heartfelt celebration of the women who shape our lives. Whether you’re an experienced baker or just starting out, this simple cake for beginners offers the perfect blend of ease and elegance.
With its moist vanilla sponge, soft layers, and delicate decorations, it’s the kind of cake that looks beautiful on any table and fills the room with warmth. It’s also incredibly versatile—dress it up with fresh strawberries and whipped cream, or keep it classic with a buttercream frosting.
If you’re looking for a homemade cake recipe that doubles as a thoughtful Mother’s Day gift idea, you’re in the right place. Let’s make something sweet, simple, and truly special—just like Mom.
Table of Contents
Key Benefits
There’s something undeniably special about baking a Happy Mothers Day Cake from scratch. It’s more than the following of a guide—it’s being kind, making a permanent recollection with every cannibalism. Whether you’re celebrating with a brunch spread or planning a sweet surprise, this cake checks every box: it’s easy to make, beautiful to present, and absolutely irresistible to taste.
Here’s why this homemade cake recipe deserves a spot in your Mother’s Day celebration:
- Simple ingredients, stunning results: You don’t need fancy tools or obscure ingredients. Just pantry staples like flour, butter, and vanilla extract come together to create a bakery-style masterpiece.
- Perfect for all skill levels: This is a simple cake for beginners, but the final result looks like you spent hours in the kitchen. Spoiler: you didn’t.
- Customizable for every mom: Whether she loves fresh strawberries, rich chocolate, or whipped cream, this cake can be dressed up or down to match her favorite flavors.
- A heartfelt gift: Forget flowers and cards (well, maybe not entirely)—a homemade dessert says, I thought of you, and I made this just for you.
And let’s not forget: this Mothers Day dessert isn’t just for one day a year. It’s a go-to recipe you can tweak for birthdays, anniversaries, or anytime you want to celebrate someone special.
Pro Tip: Add a hand-piped message like “Love You, Mom” on top with a bit of colored buttercream for that extra-sweet personal touch.
Up next, let’s take a look at the ingredients you’ll need to get started. Spoiler alert: Most of these ingredients should be in your kitchen cabinet.
Ingredients
Let’s talk about the delicious building blocks of your Happy Mothers Day Cake. The magic lies in using fresh, simple ingredients to create a moist, fluffy sponge cake that melts in your mouth. Don’t worry—nothing complicated here, just a wholesome blend of classic staples that work beautifully together.

Here’s what you’ll need:
For the Vanilla Cake Layers:
- 2 ½ cups all-purpose flour – Spoon and level it for accuracy.
- 2 ½ tsp baking powder – Gives your cake that perfect rise.
- ½ tsp salt – Just enough to balance the sweetness.
- ¾ cup unsalted butter, softened – Room temperature makes for easier creaming.
- 1 ¾ cups granulated sugar – Adds sweetness and structure.
- 4 large eggs – Bring them to room temperature for a smoother batter.
- 1 tbsp vanilla extract – A must for that rich, comforting flavor.
- 1 cup whole milk – Also room temp; helps keep the batter light and moist.
For the Whipped Cream Frosting:
- 2 cups heavy whipping cream – Chill it for best results.
- ½ cup powdered sugar – Adds subtle sweetness without making it too dense.
- 1 tsp vanilla extract – Just a touch enhances the cream beautifully.
Optional Decorations:
- Fresh strawberries or raspberries – For a fruity, festive touch.
- Edible flowers or heart-shaped sprinkles – Add charm without fuss.
- Buttercream lettering – Use a piping bag to write a message like “Love You, Mom.”
Ingredient Notes:
- Can’t find heavy cream? Swap it with a store-bought whipped topping in a pinch, but keep in mind the homemade version tastes creamier and more natural.
- Making it gluten-free? Substitute the flour with a 1:1 gluten-free blend. Just don’t skip the baking powder!
- Dairy-free version? Use a plant-based butter and almond or oat milk. It works surprisingly well and keeps the texture soft.
Having your ingredients prepped and at room temperature makes all the difference. It ensures a smoother batter, better rise, and ultimately, a cake that’s tender, light, and absolutely bakery-worthy.
Next, we’ll walk through the step-by-step process of making your Mother’s Day cake from scratch. Ready to bake some love?
How to Make Happy Mothers Day Cake
Ready to roll up your sleeves? Let’s walk through how to create this Happy Mothers Day Cake from scratch. Whether you’re baking to impress or just want to show Mom some heartfelt love, this step-by-step guide will help you turn a handful of ingredients into a beautiful, delicious masterpiece.
What we want is a moist vanilla sponge cake and with its light, airy texture a fluffy whipped frosting that is perfect for layers and decorative purposes.
Step-by-Step Instructions
Step 1: Prep Your Tools and Oven
- Preheat your oven to 350°F (175°C).
- It is crucial to line the baking pans with parchment paper after lubricating them.
- Let your eggs, butter, and milk sit out until they reach room temperature.
Tip: Room temperature ingredients aid in a better blend, which helps rising stacks of batter and makes batter texture smoother overall.
Step 2: Make the Cake Batter
- Sift dry ingredients
In a large bowl, whisk together:- 2 ½ cups all-purpose flour
- 2 ½ tsp baking powder
- ½ tsp salt
- Cream butter and sugar
In a another bowl, combine 1 ¾ cups sugar and ¾ cup melted butter. Beat for 3 to 4 minutes, or until the mixture is light and fluffy. A stand mixer works best, but a hand mixer does the trick, too. - Add eggs and vanilla
Beat in the eggs in stages, and brush down the sides of the bowl. Add 1 tbsp vanilla extract and mix well. - Alternate dry ingredients and milk
In three additions, mix the flour mixture while alternating it with 1 cup of milk. Start and end with the dry ingredients. Mix just until combined—don’t overdo it!
Step 3: Bake the Cakes
- Fill each pan equally with batter and then smooth it entirely.
- Bake the cupcake, for about 28–32 minutes until a toothpick inserted into the center of the cupcake comes out batter free.
- Leave the cakes in the pans for 10 minutes, remove them and lay them on wire racks letting them cool the rest way.
Pro Tip: Resist the urge to frost the cakes while they’re warm. You’ll end up with melting layers and runny cream.
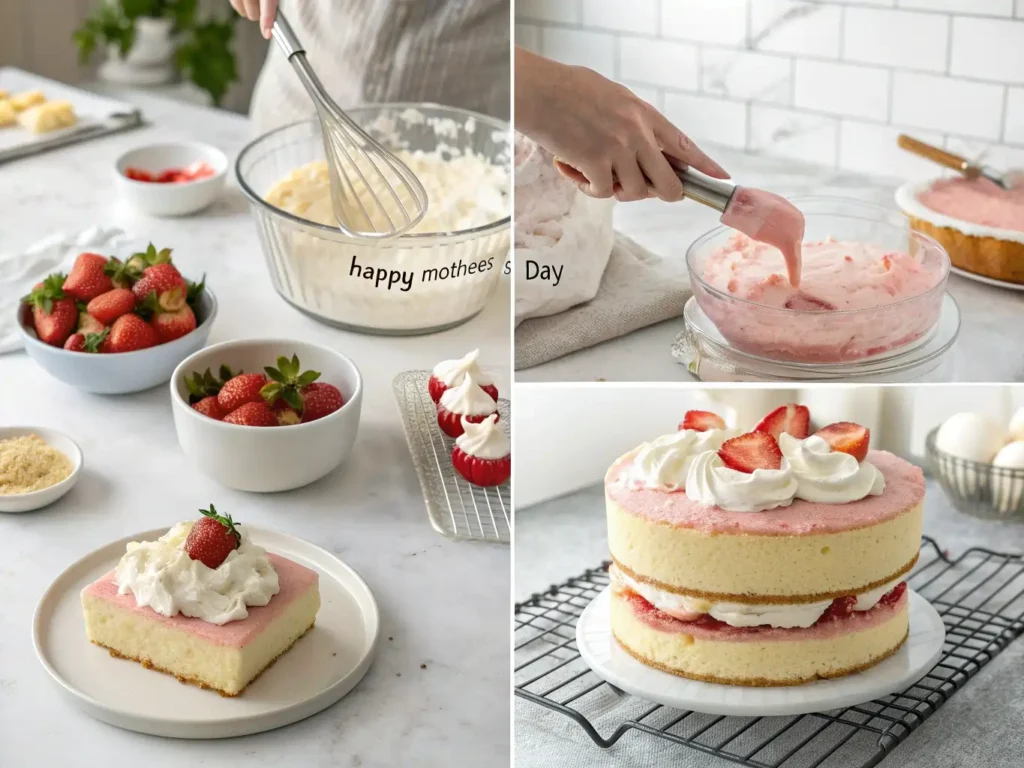
Step 4: Make the Whipped Cream Frosting
- In a chilled mixing bowl, whip together:
- 2 cups heavy cream
- ½ cup powdered sugar
- 1 tsp vanilla extract
- Whip on high speed until stiff peaks form. It should be creamy, not grainy.
Step 5: Assemble the Cake
- Place one cake layer on a serving plate.
- Spread an even layer of whipped cream over the top.
- Add sliced strawberries if you’d like a fruity surprise.
- Place the second cake on top and cap the cake with the left over whipped cream.
- Decorate with more berries, sprinkles, or even a buttercream message like “Love You, Mom.”
And just like that, you’ve baked a heartfelt, gorgeous Mother’s Day dessert that says more than words ever could.
Coming up next: Prepare to hear some astounding ideas and well proven advice from the pros to make your looking cake unbeatable!
Pro Tips and Variations
Baking a cake from scratch feels like a triumph—but making it feel personal? That’s the real magic. This Happy Mothers Day Cake is as adaptable as it is delicious, so here are some pro tips and creative twists to make your version extra special.
Whether you’re looking for a gluten-free option, a flavor boost, or decorating ideas that wow, these suggestions will take your cake from lovely to unforgettable.
Pro Tips for Foolproof Results
- Use a cake strip for even baking
Wrap damp cake strips around your pans before baking. It helps the cake rise evenly and prevents a domed top—ideal for stacking. - Don’t skip sifting
Sifting your dry ingredients adds air, removes clumps, and leads to a lighter, more tender vanilla sponge cake. - Chill your tools for whipped cream
Cold cream + a chilled bowl + cold beaters = the fluffiest whipped topping. Stick them in the freezer for 10 minutes before whipping. - Level your layers
If your cake layers puff up unevenly, use a serrated knife to gently trim them flat. This makes stacking easier and keeps your cake stable. - Decorate just before serving
Especially if you’re using fresh berries, decorate closer to serving time to prevent the fruit from weeping or softening the frosting.
Tasty Variations to Try
Want to customize the cake for Mom’s favorite flavors or dietary needs? Here are a few delicious variations:
- Chocolate Lover’s Twist
Swap out ½ cup of flour for unsweetened cocoa powder and add mini chocolate chips to the batter for a rich, chocolatey base. - Berry Bliss Filling
Add a layer of raspberry preserves or fresh fruit compote between the cake layers for a fruity surprise that cuts the sweetness beautifully. - Citrus Zest Upgrade
Add a tablespoon of orange or lemon zest to the batter and frosting for a bright, fresh twist that pairs perfectly with whipped cream. - Gluten-Free Option
Combine your recipe with a 1:1 substitute of gluten-free and match it up with ½ teaspoon of xanthan gum for the right structure. Keep the rest of the recipe the same. - Dairy-Free Delight
Substitute the butter with plant-based butter and the milk and cream with almond milk and coconut cream. The flavor is still dreamy, and Mom will love the thoughtfulness.
Pro Tip: Wish to create “Happy Mother’s Day” in an elegant way? Start by practicing your design onto the parchment paper and then transfer it to the cake using a piping bag as well as using the fine round tip.
Next up, we’ll share how to plate, serve, and elevate the cake into a showstopping centerpiece for your Mother’s Day celebration!
Serving Suggestions
Now that your Happy Mothers Day Cake is baked, frosted, and lovingly decorated, let’s make sure it’s presented in a way that truly honors the occasion. This cake isn’t just a dessert—it’s the centerpiece of your celebration and a heartfelt tribute to someone special.
Whether you’re hosting a brunch, planning a surprise tea party, or simply delivering a slice of love, here are some beautiful and thoughtful ways to serve it.
Make It a Moment, Not Just a Meal
- Use a cake stand
Elevate the cake—literally. A decorative cake stand adds instant elegance and makes the cake the visual focal point of your Mother’s Day dessert table. - Garnish with love
Add final touches like:- A handful of fresh strawberries or raspberries
- Mint leaves for a pop of green
- Bring some freshness to your garden with such edible flowers as pansies or violas
- Light dusting of powdered sugar for a soft, dreamy look
- Serve with a side pairing
Balance the sweetness by pairing the cake with:- Freshly brewed herbal tea, like chamomile or mint
- A light fruit salad with seasonal berries
- Vanilla ice cream or lemon sorbet for contrast
Pro Tip: Slice the cake with a warm knife (dip it in hot water and wipe clean between cuts) for perfect, smooth slices.
Personalized Touches That Matter
- Add name tags or love notes on each dessert plate if you’re serving a crowd. A short message like “Thanks for everything, Mom” adds a meaningful touch.
- Create a dessert board: Arrange slices of the cake alongside macarons, chocolate truffles, or mini tarts for a stunning dessert spread.
When and How to Serve
- This cake is best served chilled or at cool room temperature so the whipped cream holds its shape.
- If you’ve added fruit or fresh flowers, wait until just before serving to decorate to keep everything looking fresh.
- Planning to serve it later? Store it in the fridge, loosely covered, and bring it out about 20 minutes before serving for the best texture.
No matter how you serve it, this homemade Mother’s Day cake is sure to be the sweetest part of the celebration. And don’t be surprised if you’re asked to make it again next year—or next week!
Let’s wrap it up with a few final thoughts and answers to common questions.
Conclusion
At the heart of it, this Happy Mothers Day Cake is more than just a recipe—it’s a way to connect, celebrate, and show appreciation with every lovingly baked layer. Whether you’re planning a grand surprise or a quiet afternoon treat, this cake brings a homemade charm that speaks louder than store-bought gifts ever could.
The beauty of this easy Mother’s Day cake is how it blends simplicity with elegance. From the soft vanilla sponge to the cloud-like whipped cream and the thoughtful touches of fruit or florals, it’s a dessert that says, You matter, and I made this for you.
Even if you’re not a seasoned baker, don’t worry—this cake doesn’t require perfection. It just asks for your time and heart. And honestly, that’s what moms cherish most.
So whether you’re making it ahead, customizing it to her favorite flavors, or keeping it classic and sweet, you’re crafting a memory she’ll savor long after the last bite.
And hey—if you sneak a second slice for yourself, we won’t tell.
Coming up next: Got questions? We’ve got answers in the FAQs to help you troubleshoot, store, or remix this recipe with confidence.
FAQs
Let’s wrap up your baking journey with answers to some common questions. Whether it’s your first time making a Happy Mothers Day Cake or you’re looking for ways to personalize it, these tips will help you bake with confidence and ease.
Can I make this cake ahead of time?
Absolutely! It is possible for you to pre-prepare the cake layers for a maximum of two days. Pack them in plastic wrap tightly and store at room temperature. For best results, assemble and frost the cake the day you plan to serve it, especially if using whipped cream and fresh berries.
How should I store leftovers?
Leftover cake should be stored in the refrigerator due to the whipped cream frosting. Place it in an airtight container or cover with plastic wrap to keep it fresh. It’ll stay moist and delicious for up to 3 days.
Pro Tip: For longer storage, freeze individual slices wrapped in parchment and foil. Thaw overnight in the fridge before enjoying.
Can I use a different frosting?
Definitely! If you want a richer taste or need more stability in warmer settings, swap the whipped cream for buttercream frosting or cream cheese frosting. They both perfectly go with the base, vanilla sponge cake.
Can I make this recipe gluten-free?
Yes, and it turns out great! Just use a 1:1 gluten-free flour blend (with xanthan gum included) in place of regular flour. Everything else in the recipe remains the same, so you’ll still get that light, fluffy texture.
How do I prevent a dry cake?
The key is in the details:
- Don’t overmix the batter.
- Don’t be tempted to open the oven door too soon; wait for the set baking time and check when it’s time.
- Use room temperature ingredients for better emulsion and moisture retention.
Also, if you’re worried about dryness, you can lightly brush the cake layers with simple syrup before frosting for added moisture.
Can kids help with this recipe?
Yes! Kids can help with mixing, decorating, or even writing the message on top using a piping bag. It’s a sweet and memorable way to get them involved in celebrating Mom.
If there’s one takeaway, it’s this: no matter how you frost it, slice it, or serve it, this homemade Mother’s Day cake is sure to leave a lasting impression—and maybe even become a new family tradition.
Still have questions? Feel free to drop them in the comments or share your creations with us—we’d love to see how you made it your own!
Share Your Experience
There are no reviews yet. Be the first one to write one.