
The allure of crème brûlée lies in its perfect contrast between a silky, rich custard and a crisp, caramelized sugar top. Achieving that golden, glass-like crust requires the right balance of ingredients, technique, and a little science. In this section, we’ll explore what makes the top of crème brûlée so special and why it’s more than just a layer of burnt sugar.
Table of Contents
The Role of Sugar in Creating the Perfect Crust
The type of sugar used plays a crucial role in forming the ideal crème brûlée topping. Sugar not only provides sweetness but also determines how evenly the caramelization process occurs. Different sugars caramelize at varying temperatures, and choosing the right one can make a significant difference in the final texture and flavor.
- Granulated Sugar: The most common choice, granulated sugar melts quickly and forms a smooth, even caramelized layer. It’s widely available and easy to work with.
- Turbinado or Demerara Sugar: These raw sugars have larger crystals and add a deeper, more complex flavor with a slight crunch. They take longer to melt but provide a more textured topping.
- Powdered Sugar: While not typically recommended, some chefs use it for a fine, delicate layer that melts rapidly under a torch.
Pro Tip: A thin, even layer of sugar ensures proper caramelization without burning.

Why the Custard Base Matters for a Crisp Top
The custard beneath the sugar layer is just as important as the topping itself. A well-set, chilled custard provides a stable base that prevents the sugar from sinking or melting prematurely.
Key factors that influence custard stability:
- Chilling Time: The custard must be fully set and chilled for at least 4 hours (preferably overnight) to ensure it can support the caramelized layer.
- Egg Yolk Ratio: A higher ratio of egg yolks contributes to a richer, creamier texture that holds up well against the heat of the torch.
- Even Baking: Using a water bath (bain-marie) during baking ensures gentle cooking and prevents curdling, creating a perfectly smooth texture.
A well-prepared custard ensures that when you crack into the sugar top, you experience a delightful contrast between the crispy sugar and the creamy filling.
Science of Sugar Caramelization and Crystallization
Caramelization is a chemical process that occurs when sugar is heated to high temperatures, breaking down its molecules and creating complex flavors and colors. Understanding how this process works is key to achieving that perfect crackly top.
Stages of Sugar Caramelization:
- Melting (320°F/160°C): Sugar crystals liquefy, becoming clear and sticky.
- Color Change (340°F-370°F/170°C-188°C): The sugar starts turning golden brown, developing rich, nutty flavors.
- Browning (above 370°F/188°C): If heated too long, the sugar can burn, resulting in bitterness.
Factors Affecting Caramelization:
- Torch Heat: A high-heat butane torch provides direct heat to the sugar, allowing for quick caramelization without melting the custard below.
- Sugar Layer Thickness: A thin, even layer caramelizes more evenly and prevents scorching.
- Moisture Content: If the custard is too wet, it can interfere with the sugar caramelizing properly.
Pro Tip: Hold the torch at a slight angle and move it in a circular motion to ensure even caramelization without overheating one area.
Choosing the Right Sugar for a Perfect Crème Brûlée Topping
Choosing the right sugar is crucial to achieving the perfect caramelized topping for your crème brûlée. The sugar you select affects not only the flavor but also the texture, caramelization speed, and overall presentation of the dessert. Different sugars behave differently under heat, and understanding their properties can help you achieve that signature crispy, golden-brown crust that cracks beautifully under your spoon.
Comparing Granulated vs. Turbinado Sugar
When preparing crème brûlée, two of the most commonly used sugars are granulated sugar and turbinado sugar, each offering unique characteristics that impact the dessert’s topping.
1. Granulated Sugar (Best for Smooth, Even Caramelization)
- Characteristics:
- Fine, uniform crystals that dissolve quickly.
- Neutral sweetness with a clean taste.
- Caramelizes evenly under direct heat, forming a thin, delicate crust.
- Pros:
- Ideal for achieving a classic, glass-like caramel layer.
- Easy to control caramelization without risk of over-burning.
- Readily available and budget-friendly.
- Cons:
- May lack the rich depth of flavor compared to raw sugars.
- Can caramelize too quickly, making it easy to burn if overheated.
Best for: Traditional crème brûlée with a fine, crackable top that melts quickly and evenly.
2. Turbinado Sugar (For a Richer, More Textured Crust)
- Characteristics:
- Coarser, larger crystals with a light brown hue.
- Retains some natural molasses, adding a caramel-like flavor.
- Requires more heat and time to melt due to larger crystal size.
- Pros:
- Provides a more complex, slightly nutty flavor.
- Creates a thicker, crunchier topping.
- Adds visual appeal with a golden-brown color.
- Cons:
- May take longer to caramelize and require a stronger torch.
- Can become too crunchy if not evenly melted.
Best for: Those who prefer a more textured and flavorful topping with a deeper caramel taste.
3. Alternative Sugars to Consider
While granulated and turbinado sugars are the most popular choices, there are other types of sugar that can offer unique results:
- Demerara Sugar: Similar to turbinado but with slightly finer crystals, offering a balance of texture and caramel flavor.
- Brown Sugar: Contains molasses for a rich flavor but can be too moist for an even brûlée.
- Powdered Sugar: Not recommended, as it burns too quickly and lacks the necessary texture.
Pro Tip: For a perfect balance of texture and smoothness, consider blending granulated and turbinado sugar in a 50/50 ratio.
How Sugar Type Affects the Caramelization Process
The caramelization process is where sugar transforms from granules into a hard, glassy, golden crust. Different sugars caramelize at different rates and temperatures, which can affect the final result.
Key Factors That Influence Caramelization:
- Crystal Size:
- Smaller crystals (granulated sugar) melt quickly and evenly.
- Larger crystals (turbinado or demerara) take longer and can lead to uneven spots.
- Moisture Content:
- White sugar is drier, making it ideal for a quick, crisp caramel layer.
- Sugars with higher moisture content (brown or raw sugars) can take longer to caramelize and might create a softer crust.
- Heat Application:
- A butane torch provides focused heat, allowing better control over caramelization.
- A broiler method can lead to uneven melting and potential overheating.
Pro Tip: Always hold the torch a few inches away and move it in circular motions to prevent burning and ensure even caramelization.
Tips for Even Sugar Distribution
Even sugar distribution is key to achieving a perfect brûlée without burnt or under-caramelized areas. Follow these techniques to ensure a smooth, golden topping:
1. Dry the Custard Surface
- Before adding sugar, gently pat the surface of the custard with a paper towel to remove excess moisture.
- Moisture can dissolve sugar and prevent proper caramelization.
2. Use a Fine Sieve
- Sprinkle the sugar through a fine mesh sieve to create an even, thin layer across the custard.
- Avoid dumping sugar directly, as it can form clumps and lead to uneven caramelization.
3. Tilt and Rotate the Ramekin
- After sprinkling, gently tilt and rotate the ramekin to distribute sugar evenly across the surface.
- This technique ensures a uniform layer without over-concentration in one spot.
4. Remove Excess Sugar
- Once sugar is spread, gently tap out any excess to prevent an overly thick layer.
- A thick sugar layer can result in a hard, difficult-to-crack crust.
Pro Tip: If you prefer a thicker topping, apply sugar in two thin layers, torching in between for a multi-layered effect.
Best Sugar Practices for a Professional Finish
To achieve a restaurant-quality crème brûlée topping, follow these expert tips:
- Use Room Temperature Custard: A chilled custard can cause condensation, affecting sugar melting.
- Opt for a Butane Torch: Provides precise control compared to oven broilers.
- Experiment with Sugar Blends: Combining different sugar types can enhance texture and flavor.
- Caramelize Just Before Serving: To ensure the sugar stays crisp and doesn’t absorb moisture from the custard.
- Avoid Over-Torching: Overheated sugar can burn quickly, leading to bitterness.
Tools and Techniques to Caramelize the Top Perfectly
Achieving the perfect caramelized top for crème brûlée requires the right tools and precise techniques. The golden-brown, glass-like sugar crust that cracks beautifully under a spoon is a result of careful preparation and proper application of heat. Whether you’re using a culinary torch or an oven broiler, mastering these tools and techniques will ensure an evenly caramelized topping without overcooking the delicate custard beneath.
Using a Culinary Torch vs. Broiler: Pros and Cons
When it comes to caramelizing crème brûlée, two primary methods are commonly used: a culinary torch and an oven broiler. Each method has its own advantages and challenges, and choosing the right one depends on your preference and available equipment.
1. Culinary Torch (Preferred Method for Precision)
A butane or propane torch is the most popular tool for achieving a perfectly caramelized crème brûlée topping. It offers precise control over the heat application, allowing you to caramelize the sugar evenly without affecting the custard underneath.
Pros:
- Provides precise control, allowing you to direct heat exactly where it’s needed.
- Achieves an even, golden-brown caramelization with a satisfying crunch.
- Works quickly, preventing the custard from warming up.
- Portable and easy to use.
Cons:
- Requires purchasing and refilling fuel (butane or propane).
- Can be intimidating for beginners.
- Uneven application can result in burnt spots.
Pro Tip: Use a medium flame and move the torch in circular motions for even caramelization.
2. Oven Broiler (Alternative for Home Cooks Without a Torch)
If you don’t have a culinary torch, an oven broiler can be used to caramelize the sugar. This method uses indirect heat from above to melt and caramelize the sugar layer.
Pros:
- No special equipment required—most ovens have a built-in broiler.
- Can caramelize multiple ramekins at once.
- Simple and convenient for beginners.
Cons:
- Less control over the caramelization process.
- Can overheat the custard if left too long.
- Uneven heat distribution may result in hot and cold spots.
Pro Tip: Keep the ramekins close to the broiler and rotate them occasionally to ensure even caramelization.
Step-by-Step Guide to Achieving an Even Burnt Sugar Layer
Follow these steps to create a flawless caramelized topping for your crème brûlée, whether using a culinary torch or an oven broiler.

1. Prepare the Custard Base
- Ensure the custard is fully chilled (at least 4 hours or overnight).
- Dab off any moisture on the surface with a paper towel to prevent uneven caramelization.
2. Evenly Distribute the Sugar
- Use fine granulated sugar or a mix of turbinado and granulated sugar for optimal results.
- Sift sugar over the custard using a fine sieve for an even layer.
- Tilt the ramekin gently to distribute the sugar uniformly.
3. Torch Technique for Precision Caramelization
- Hold the torch 2–3 inches away from the surface.
- Use a circular motion, slowly moving across the surface to melt the sugar evenly.
- Allow the sugar to bubble and turn golden brown, being careful not to burn it.
4. Broiler Technique for Consistent Heat Application
- Preheat the oven broiler to high and place the ramekins on the top rack.
- Observe to prevent burning while you broil for two to four minutes.
- Rotate ramekins halfway through for an even caramelization.
5. Cooling and Setting
- Before serving, let the caramelized sugar cool for one to two minutes.
- The sugar should harden into a crisp shell that cracks under a spoon.
Avoiding Common Mistakes When Torching Crème Brûlée
Even experienced cooks can encounter issues when caramelizing the sugar topping. Here are some typical errors and ways to prevent them:
1. Uneven Caramelization
Mistake: Some areas remain uncaramelized while others burn.
Solution: Move the torch continuously in circular motions to distribute heat evenly.
2. Melting the Custard
Mistake: Holding the torch too close can warm or melt the custard beneath.
Solution: Maintain a safe distance (2–3 inches) and use a moderate flame.
3. Sugar Doesn’t Caramelize Properly
Mistake: Sugar remains grainy or doesn’t melt evenly.
Solution: Ensure the sugar is finely sifted and evenly distributed.
4. Over-Burning the Sugar
Mistake: The sugar becomes too dark, leading to a bitter taste.
Solution: Keep a close eye and stop once a golden amber color is achieved.
5. Not Letting the Sugar Set
Mistake: Cracking the sugar too soon results in a sticky texture.
Solution: Allow it to cool for at least 1–2 minutes to harden properly.
Recommended Tools for Caramelizing Crème Brûlée
To achieve the perfect caramelized topping, investing in the right tools can make a significant difference in the results.
- Butane Torch (Recommended):
- Provides precise control over caramelization.
- Brands to consider: Iwatani, Bernzomatic, Jo Chef.
- Propane Torch:
- Larger and more powerful than butane torches.
- Ideal for professional kitchens.
- Fine Mesh Sieve:
- Helps in evenly distributing sugar for smooth caramelization.
- Heat-Resistant Ramekins:
- Ensures even heat distribution without cracking.
- Digital Kitchen Thermometer:
- To monitor custard temperature before caramelization.
Achieving the Ideal Contrast Between Custard and Caramelized Top
The beauty of crème brûlée lies in its delicate balance of textures—the velvety, creamy custard beneath and the crisp, caramelized sugar crust on top. Achieving this perfect contrast requires attention to detail in both the custard preparation and the caramelization process. In this section, we’ll explore key techniques to ensure your crème brûlée delivers that iconic smooth-cream-to-crackly-sugar ratio.

The Importance of Chilling the Custard Before Brûléeing
Chilling the custard is a critical step that directly impacts the final texture of your crème brûlée. If the custard is not properly chilled, it can soften or even melt under the intense heat used to caramelize the sugar, leading to a soupy consistency instead of the desired creamy texture.
Why Chilling Matters:
- Firmness and Stability:
- Cold custard holds its shape better and provides a sturdy foundation for the caramelized sugar layer.
- A well-chilled custard prevents the heat from the torch or broiler from penetrating too deeply.
- Even Caramelization:
- When the custard is cold, it allows the sugar to caramelize without melting the underlying layer.
- This helps achieve a crisp topping that contrasts beautifully with the creamy custard.
- Enhanced Flavor Development:
- Allowing the custard to rest and chill (preferably overnight) deepens the flavors, letting the vanilla and cream blend harmoniously.
Pro Tips for Chilling:
- Refrigerate for at least 4 hours, but ideally overnight, for the best texture.
- Cover the ramekins with plastic wrap to prevent them from absorbing fridge odors.
- Before brûléeing, gently dab the surface of the custard with a paper towel to remove condensation that might interfere with caramelization.
Balancing Texture: Crisp Top vs. Creamy Base
The hallmark of a perfect crème brûlée is the contrast between the creamy custard and the crunchy, caramelized topping. Achieving this delicate balance requires precision in both the custard-making process and the caramelization technique.
1. Custard Preparation for a Smooth Texture:
- Use a proper custard-to-egg ratio, typically around 4 egg yolks per 1 cup of cream, to create a rich yet delicate consistency.
- Cook the custard gently using a bain-marie (water bath) to ensure even heating and prevent curdling.
- Strain the custard mixture before baking to remove any lumps, ensuring a silky smooth base.
- Bake at a low temperature (around 150°C/300°F) to achieve a creamy consistency without bubbles.
2. Sugar Layer for a Crisp Top:
- Apply an even, thin layer of sugar to promote uniform caramelization.
- Use a culinary torch for precise control, or broil carefully to avoid overcooking the custard beneath.
- Allow the sugar to cool for a minute after caramelization to harden into a perfect crackable shell.
3. Serving Temperature Matters:
- Crème brûlée is best enjoyed slightly chilled with a warm, freshly caramelized top.
- Let it sit at room temperature for a few minutes after brûléeing to enhance the contrast between textures.
Classic French Dessert Presentation Tips
Presentation plays a vital role in elevating your crème brûlée from a simple dessert to a fine dining experience. Here are some classic French techniques to make your dessert look as good as it tastes.
1. Achieving a Golden-Brown Finish:
- Caramelize the sugar evenly, aiming for a golden amber hue rather than a dark brown to avoid bitterness.
- Use a rotating motion with the torch to distribute heat uniformly without burning any one spot.
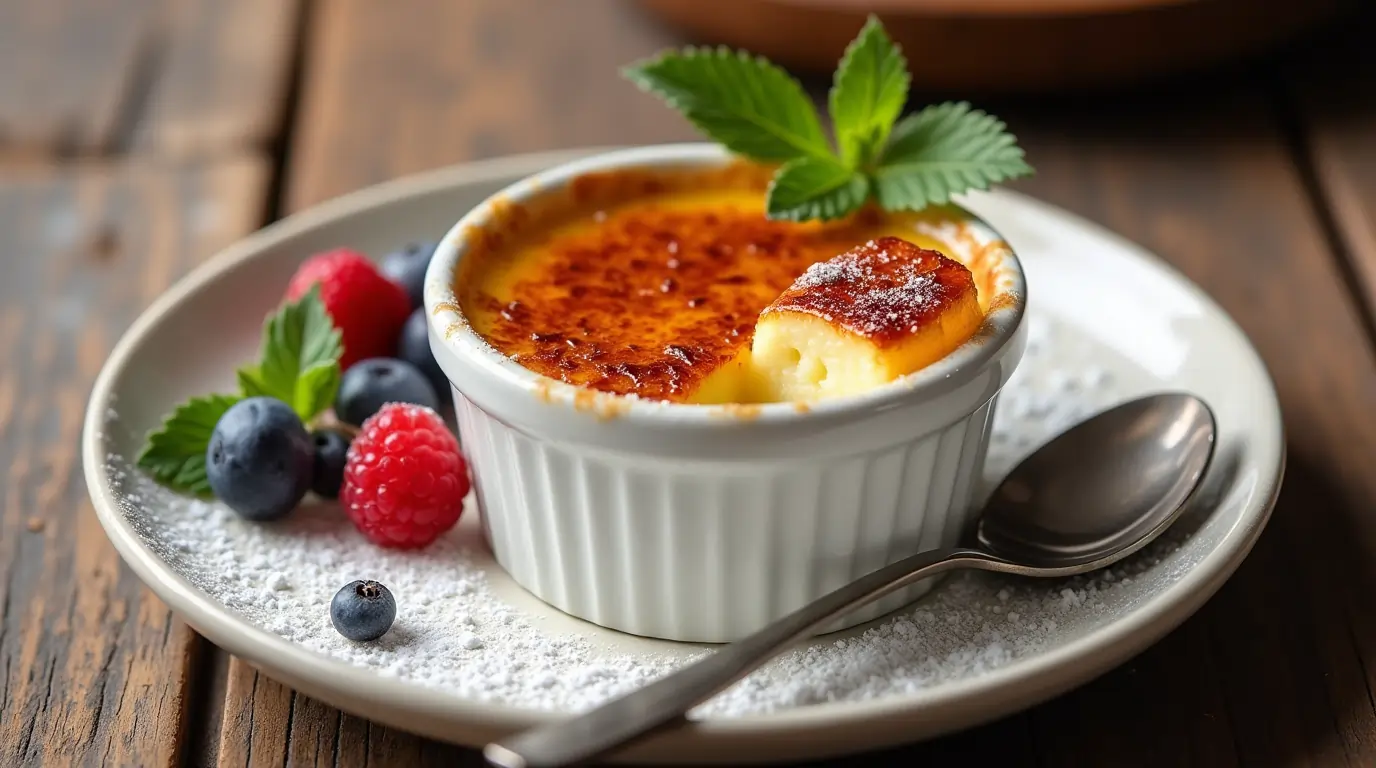
2. Garnishing for a Professional Touch:
- A light dusting of powdered sugar or a few fresh berries can enhance the visual appeal.
- Add a small sprig of mint for a pop of color and freshness.
- Serve with a side of whipped cream or a light biscuit for added texture contrast.
3. Choosing the Right Ramekins:
- Use shallow, wide ramekins for a greater sugar-to-custard ratio, enhancing the contrast in every bite.
- Classic white ceramic ramekins provide a timeless, elegant look.
4. Serving Like a Pro:
- Serve crème brûlée with a small dessert spoon, allowing guests to experience the satisfying “crack” when breaking the caramelized top.
- Pair it with a dessert wine, such as Sauternes or a light espresso, to complement the flavors.
Troubleshooting Crème Brûlée Topping Issues
Even experienced chefs can encounter challenges when creating the signature caramelized top of crème brûlée. From sugar that won’t melt evenly to a topping that’s too thick or burnt, various factors can affect the final outcome. This section covers common crème brûlée topping problems and practical solutions to help you achieve that perfect caramelized crust every time.
Why Isn’t My Sugar Melting Evenly?
If the sugar layer is melting unevenly, it can result in patchy caramelization with some areas remaining grainy while others become too dark. This issue is often caused by uneven sugar distribution, improper torch technique, or using the wrong type of sugar.
Possible Causes:
- Uneven Sugar Distribution:
- If the sugar layer is applied too thickly or unevenly, some spots may melt faster than others.
- Using Coarse Sugar:
- Large sugar crystals, like turbinado or demerara, take longer to melt and can caramelize unevenly.
- Torch Placement:
- Holding the torch too close or moving it too quickly can create uneven heating.
- Moisture on the Custard:
- Any condensation or wetness on the custard can cause sugar to clump and melt inconsistently.
Solutions:
- Use a fine sieve to evenly distribute a thin, uniform layer of sugar across the surface.
- Choose fine granulated sugar for smoother and quicker caramelization.
- Hold the torch 2–3 inches away, and move it in slow circular motions for consistent heating.
- Dab the custard surface with a paper towel before adding sugar to remove any moisture.
Pro Tip: If some sugar remains uncaramelized, allow the custard to cool slightly before torching again to prevent overheating.
Fixing a Too-Runny or Too-Thick Sugar Layer
Getting the sugar layer just right is crucial for achieving the perfect crack when tapping the top of the crème brûlée. A layer that’s too thin may not provide enough crunch, while a thick layer can make the dessert difficult to enjoy.
Too-Runny Sugar Layer:
If the sugar layer appears too runny after torching, it’s likely due to:
- Using too much heat: Overheating causes sugar to liquefy rather than caramelize properly.
- Not enough sugar: A very thin sugar layer can melt too quickly and not solidify properly.
- High moisture content: The custard may still contain too much surface moisture.
Solution:
- Apply a slightly thicker sugar layer and torch gradually to avoid overheating.
- Chill the custard thoroughly before applying sugar to ensure it remains firm during caramelization.
Too-Thick Sugar Layer:
If the caramelized sugar is too thick and hard to crack:
- Too much sugar applied: An excessive amount leads to an overly thick, hard shell.
- Low heat exposure: Inadequate torching can result in a sugar layer that remains granulated underneath.
- Not rotating the ramekin: Some parts may caramelize faster than others, leaving uneven thickness.
Solution:
- Sprinkle a lighter sugar layer and ensure an even distribution.
- Torch gradually and focus on one section at a time.
- Rotate the ramekin while torching to achieve even caramelization.
Pro Tip: For an ideal texture, aim for a sugar layer that’s about ⅛ inch thick.
How to Avoid Over-Caramelization and Bitterness
A perfectly caramelized top should be golden brown and crisp, not dark and bitter. Over-caramelization can occur if the sugar is exposed to excessive heat or left under the broiler for too long.
Common Causes of Over-Caramelization:
- Torching Too Close:
- Applying heat too directly can cause the sugar to burn before it melts evenly.
- Holding Heat Too Long:
- Keeping the flame in one spot for too long can create blackened, bitter areas.
- Using Brown or High-Moisture Sugar:
- Sugars like brown sugar caramelize too quickly and can burn easily.
Solutions to Prevent Burnt Sugar:
- Maintain a medium torch flame and keep it at least 2 inches away from the sugar surface.
- Move the torch continuously in circular or sweeping motions to avoid overheating any single spot.
- Choose white granulated sugar, which caramelizes at a slower, more controlled rate.
- If using an oven broiler, place the ramekins on the top rack but monitor them closely to prevent burning.
Pro Tip: Stop torching when the sugar is golden amber and bubbling evenly; it will continue to darken slightly as it cools.
Preventing Sugar from Absorbing Moisture and Becoming Sticky
One of the most frustrating issues with crème brûlée is when the sugar topping turns sticky instead of forming a crisp shell. This often happens if the dessert sits too long before serving or is stored improperly.
Why Sugar Becomes Sticky:
- Humidity Exposure:
- Storing crème brûlée uncovered in a humid environment can cause the sugar to absorb moisture and lose its crunch.
- Refrigeration After Caramelization:
- Refrigerating caramelized crème brûlée causes condensation to form, softening the sugar layer.
- Not Serving Immediately:
- The caramelized topping should be enjoyed within a short time after being torched.
Solutions to Keep the Topping Crisp:
- Caramelize the sugar just before serving to maintain the perfect crunchy texture.
- If you must prepare in advance, store the custard and torch the sugar just before serving.
- Use a dehumidifier in the kitchen if you’re working in a humid environment.
- Store leftovers covered lightly with foil instead of plastic wrap to minimize moisture buildup.
Pro Tip: If your sugar becomes sticky, place the ramekin under the broiler for a quick refresh to recrystallize the sugar.
FAQs
What sugar is best for crème brûlée?
Granulated sugar is the best choice for a smooth, even caramelization. Turbinado sugar can be used for a crunchier texture and deeper flavor.
How long should I torch the sugar?
Torch for about 1-2 minutes, moving in circular motions until the sugar turns golden brown and bubbly.
Can I make crème brûlée without a torch?
Yes, you can use an oven broiler. Place ramekins under the broiler for 2-4 minutes, observing to prevent burning.
Why does my caramelized top taste bitter?
Over-torching the sugar can cause it to burn. Keep the flame moving and aim for a golden color rather than dark brown.
Can I prepare crème brûlée in advance?
Yes, the custard can be made 2-3 days ahead, but caramelize the sugar just before serving for the best texture.
Conclusion
Crème brûlée is more than just a dessert—it’s a delicate balance of creamy custard and a perfectly caramelized sugar crust that delights both the palate and the senses. Achieving this harmony requires a combination of the right ingredients, proper technique, and attention to detail at every stage, from preparation to serving.
By understanding the science behind the custard base and caramelization process, you can consistently create a flawless crème brûlée that not only looks professional but also delivers the iconic textural contrast that makes it so irresistible. Whether you’re a home cook experimenting in your kitchen or a seasoned chef aiming for perfection, following these tips will ensure success.
Share Your Experience
There are no reviews yet. Be the first one to write one.