
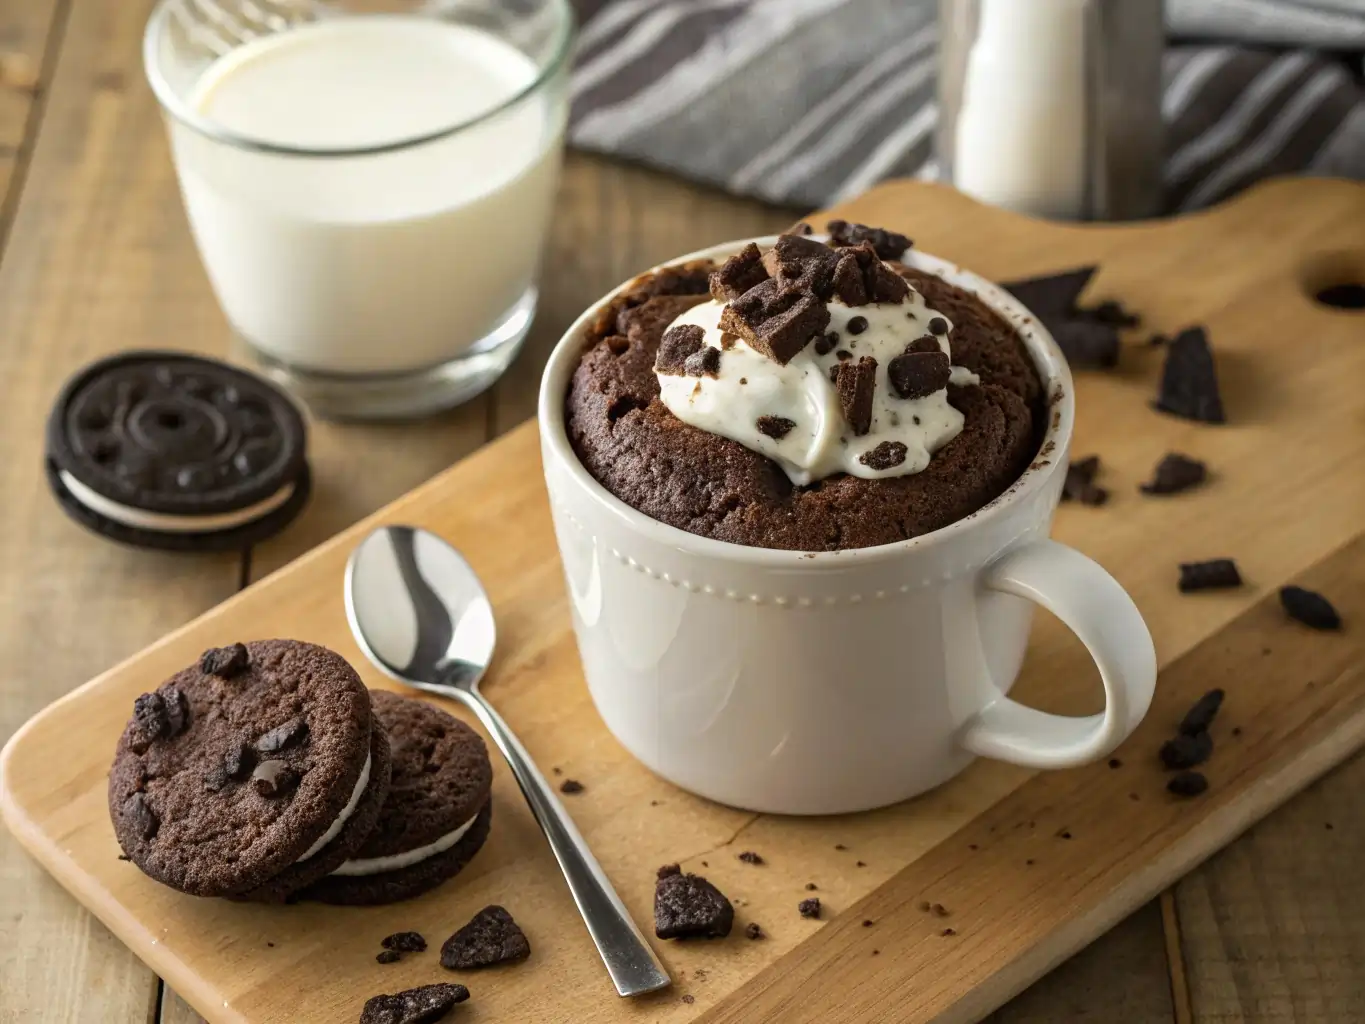
Craving something sweet but don’t want to deal with a sink full of dishes or a hot oven? This Oreo mug cake recipe might just be your new go-to dessert. It’s the kind of easy chocolate dessert you can whip up in minutes—yes, minutes—using simple pantry staples and just a microwave-safe mug.
Whether you’re battling a late-night craving or need a quick treat between Zoom calls, this single-serve cake delivers rich, fluffy, cookies-and-cream goodness with zero hassle. No fancy tools, no long prep—just pure comfort in a cup. If you’ve ever wished for a personal-sized Oreo dessert that’s as fun to make as it is to eat, you’re in the right place.
Ready to transform a few crushed Oreos into something truly magical? Let’s dive in.
Table of Contents
Key Benefits
What makes this Oreo mug cake recipe truly irresistible isn’t just the taste—it’s the simplicity. Imagine a warm, gooey cookies and cream treat that’s ready in under five minutes, no oven required. Sounds dreamy, right? This dessert recipe rocks the sweet dessert world for the following reasons:
- Quick and easy: All you need is a mug, a microwave, and a few common ingredients. It’s the perfect 5-minute dessert for busy days or lazy nights.
- Minimal cleanup: Since everything comes together in a single mug, you’ll skip the sink full of mixing bowls. More time to relax, less time scrubbing.
- No baking skills required: Whether you’re a seasoned home cook or just starting out, this microwave mug cake is virtually foolproof.
- Customizable: Add-ins like chocolate chips, peanut butter, or even a scoop of ice cream on top can take it to the next level.
- Perfect portion size: This single-serve cake satisfies your sweet tooth without tempting you with leftovers. It’s indulgence without the guilt.
This isn’t just a recipe—it’s your new secret weapon for late-night cravings and last-minute dessert wins. Let’s make dessert feel effortless again.
Ingredients
You’ll love how simple and accessible the ingredients are for this Oreo mug cake recipe—most of them are probably already in your kitchen. No need for fancy tools or specialty items. Just grab a mug and let’s get mixing.

Here’s what you’ll need:
- 4 Oreo cookies – crushed into fine crumbs (these are your base and your flavor hero)
- 3 tablespoons milk – any kind works, but whole milk gives the richest texture
- 1 tablespoon all-purpose flour – helps the cake hold its shape
- ½ tablespoon granulated sugar – just a touch to balance the cocoa
- Baking powder in a small amount (¼ teaspoon) provides the needed elevation to create gentle and fluffy texture in your cake.
- Use ½ tablespoon unsweetened cocoa powder for an optional boost of chocolate taste.
- A tiny bit of salt will both improve the taste while balancing the sweetness effect.
Optional Add-Ins:
- Chocolate chips – for melty pockets of extra indulgence
- A small amount of vanilla extract – will deepen the taste of a recipe
- Whipped cream or ice cream – for topping after microwaving
- More crushed Oreos – because more is more, right?
Pro Tip: Crush the Oreos using a zip-top bag and a rolling pin (or the back of a spoon if you’re in a hurry). You want a crumb-like texture, not big chunks, so everything blends smoothly.
Every ingredient here plays a role in making this microwave mug cake moist, fluffy, and packed with cookies and cream flavor. Up next, I’ll walk you through just how easy it is to bring this sweet little treat to life.
How to Make Oreo Mug Cake Recipe
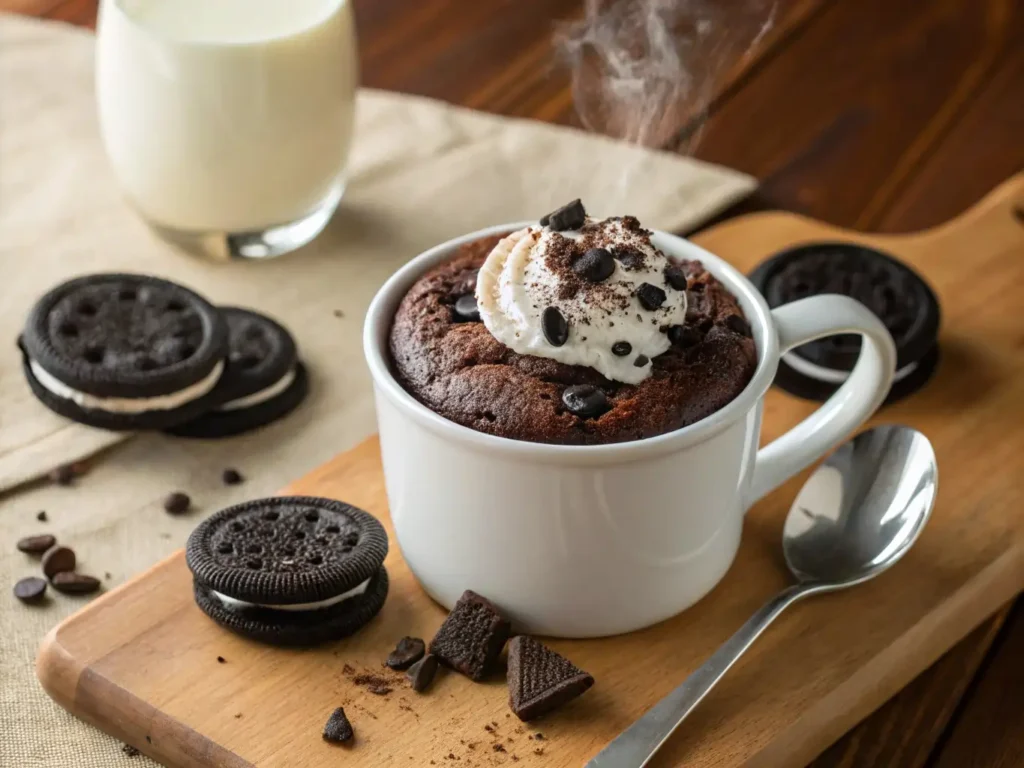
Making this Oreo mug cake recipe is so easy, it almost feels like magic. In just a few minutes, you’ll have a warm, fluffy, chocolatey dessert that tastes like a cross between a brownie and a cookies-and-cream cake—all in one mug. No oven, no stress, and definitely no waiting.
Here’s how to make it step-by-step:
Step-by-Step Instructions:
- Crush the Oreos
Place Oreo cookies into a sealed plastic bag and hit them with a rolling pin or metal craft tool to make small bits. The food processor can replace your stand mixer if you own one. - Mix in the mug
Add the crushed Oreos to a microwave-safe mug. To make a base mixture in a mixing bowl start with milk then combine flour, sugar, cocoa powder, baking powder, and a tiny bit of salt. Stir well with a spoon or fork until the batter is smooth and everything is fully combined. - Optional Add-ins
Stir in a few chocolate chips or a splash of vanilla extract if you’re feeling fancy. This step isn’t necessary, but it adds an extra layer of richness. - Microwave
Put the mug in the microwave to heat at the highest setting for time between 60 to 90 seconds according to your microwave’s power level. Start with 60 seconds and check. The cake should rise and look set on top but still soft inside. Avoid overcooking—it can turn dry quickly. - Cool slightly
Let your cake sit for about a minute to cool. This allows it to firm up just enough to enjoy without burning your tongue. - Top and serve
Add a dollop of whipped cream, a scoop of ice cream, or even more crushed Oreos on top. Dig in while it’s warm and gooey!
This microwave Oreo mug cake is proof that dessert doesn’t have to be complicated to be delicious. With minimal ingredients and effort, you get maximum reward in every bite. Ready to take it up a notch? Keep reading for pro tips and easy ways to switch it up.
Pro Tips and Variations
One of the best things about this Oreo mug cake recipe is how adaptable it is. Whether you want to level it up or adjust it to fit your preferences, these tips and variations will help you make every mug cake feel like a custom creation.

Pro Tips for Mug Cake Success:
- Use a standard-size microwave-safe mug
Aim for an 8 to 12 oz mug. Anything smaller might overflow as the cake rises during cooking. - Crush the Oreos finely
The finer the crumb, the smoother the texture. This ensures the cookies break down completely and create that rich, cake-like bite. - Don’t overmix
Stir just until everything comes together. Overmixing can make your mug cake tough or rubbery. - Microwave times vary
Start with 60 seconds and add 10–15 seconds at a time if needed. The cake should be firm on top but soft and moist inside. - Let it rest
Allowing the mug cake to sit for one minute after microwaving helps it finish setting and keeps the texture tender.
Easy Variations to Try:
- Double chocolate version
Add a tablespoon of mini chocolate chips to the batter for an ultra-rich, fudgy finish. - Peanut butter swirl
Drop in a teaspoon of creamy peanut butter before microwaving, then swirl it lightly into the batter with a toothpick. - Mint cookies and cream
Swap regular Oreos for mint-flavored ones and add a drop of peppermint extract for a refreshing twist. - Vegan-friendly
Use plant-based milk and check your Oreos (many are accidentally vegan) to enjoy a dairy-free version. - Gluten-free option
Substitute gluten-free chocolate sandwich cookies and swap in a 1:1 gluten-free flour blend.
Think of this microwave dessert as your base recipe, and let your creativity take over from there. Whether you’re craving extra chocolate, a hit of spice, or something totally unique, this single-serve sweet treat is endlessly customizable.
Serving Suggestions
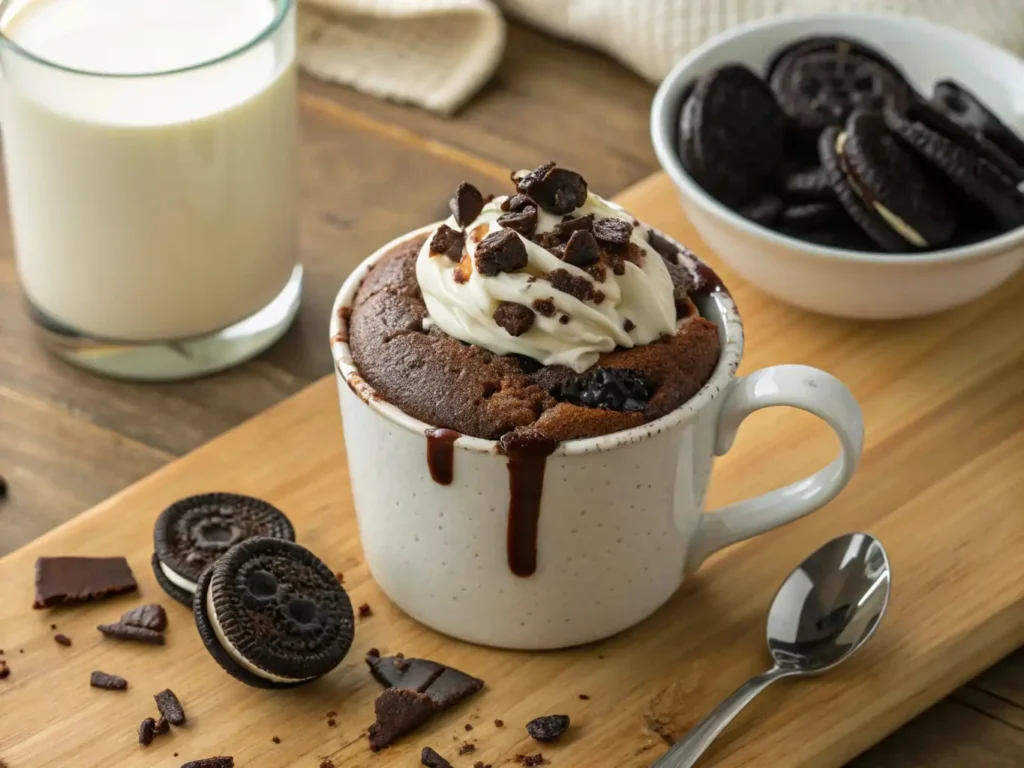
After all the anticipation of making this Oreo mug cake, the best part is digging in! But why stop there? You can easily elevate your microwave mug cake experience with a few delicious toppings and creative serving ideas. Here are some fun ways to enjoy your sweet treat.
Topping Ideas:
- Whipped Cream
A classic choice that adds a light, creamy texture to balance the richness of the cake. For a little extra flavor, try adding a splash of vanilla or a sprinkle of cocoa powder on top. - Vanilla or Chocolate Ice Cream
You get the best of both worlds when you eat warm cake with frozen ice cream. You can’t go wrong with this pairing, and it’s sure to impress anyone you’re serving. - More Crushed Oreos
If you’re an Oreo fan (and let’s face it, who isn’t?), a few extra crushed pieces sprinkled on top add a delightful crunch and intensify the flavor. - Chocolate Syrup
Drizzle on some chocolate syrup for an extra layer of richness. It’s simple but oh-so-effective at taking this cake to dessert heaven. - Fresh Berries
For a slightly fresher contrast, try topping your mug cake with fresh strawberries or raspberries. The tartness will balance the sweetness beautifully.
Serving Suggestions:
- For a Cozy Night In
Make a mug cake for yourself and enjoy it with a hot cup of tea or coffee. Dipping your breadsticks in melted cheese is a favorite treat before ending a stress-free night at home. - Party Treat
Want to serve these at a gathering? Prepare individual servings of this Oreo mug cake and let everyone customize their toppings. It’s a fun and interactive way to treat your guests! - For Movie Nights
A perfect option for movie nights or binge-watching your favorite shows. Serve each guest their own mug cake with a variety of toppings, so they can personalize their treat.
Tip for Extra Fun:
Try serving the mug cake in a colorful or fun-shaped mug to add a little flair to your presentation. You can even create a mini dessert station with different toppings for a DIY dessert experience.
With these simple yet effective serving ideas, your Oreo mug cake will go from a quick treat to an unforgettable indulgence. Whether you’re enjoying it alone or sharing it with friends, there’s no wrong way to enjoy this easy dessert!
Conclusion
And there you have it – a simple yet indulgent Oreo mug cake recipe that’s sure to satisfy your sweet tooth in no time. Whether you’re craving something quick after a busy day or looking to surprise yourself with a delicious treat, this mug cake is the perfect solution.
With just a handful of ingredients and a few minutes in the microwave, you can enjoy a decadent dessert that’s rich, moist, and full of chocolatey goodness. The best part? You can customize it however you like, from adding extra chocolate chips to swirling in some peanut butter, making it your very own signature creation.
This easy microwave mug cake is not only the perfect personal dessert, but it also makes for a great option when you want to impress your friends or family with little effort. It’s the perfect balance of Oreo flavor and cake texture, all in one convenient mug.
So, the next time you’re craving something sweet and quick, remember this Oreo mug cake recipe. It’s guaranteed to blow your mind and satisfy your dessert cravings in just a few minutes!
Quick Recap:
- Fast and easy dessert in under 5 minutes
- Customizable with fun toppings or mix-ins
- It works great for one person or when you entertain guests
Happy baking (or should I say microwaving?)!
FAQs
I bet you have a few questions, so I’ve answered some of the most frequently asked questions about this Oreo mug cake recipe to ensure you get the best experience of your baking experience!
1. Can I make this Oreo mug cake without milk?
Yes! However, if you do not have milk, you should know that you can actually use water, almond milk or any other kind of milk that is not derived from an animal. While the texture may vary slightly, it will still turn out delicious and satisfying. The key is to get the right consistency – you want it moist but not too runny.
2. Can I prepare this recipe without using a microwave?
Absolutely! If you don’t have a microwave, you can make this mug cake in the oven. Preheat your oven to 350°F (175°C) and bake the mixture in an oven-safe mug or small dish for about 12-15 minutes, or until a toothpick inserted comes out clean.
3. Which signs suggest that it is ready to be eaten?
The mug cake should be firm on top and slightly pulling away from the sides of the mug. One of the ways you can check this is to use a toothpick and insert it on the cake mid part. You can take your cake out of the pan when the toothpick shows no more crumbs after testing. Remember, microwave ovens vary in power, so start with 60 seconds and adjust from there.
4. Do you offer cookies other than the standard type?
While Oreos are the star of this recipe, you can experiment with other chocolate sandwich cookies or even try peanut butter cookies for a unique twist. Just keep in mind that the flavor and texture might change a bit depending on the cookies you use.
5. Can I make this Oreo mug cake in advance?
This Oreo mug cake is best enjoyed fresh, right out of the microwave. However, you could prepare the dry ingredients in advance, store them in a sealed bag or container, and then add the wet ingredients and microwave when you’re ready for a quick treat.
6. Can I double the recipe?
If you’re craving more than one serving, you can certainly double the recipe, but be sure to adjust the cooking time accordingly. Use a larger mug and increase the cooking time by 30-45 seconds. Watch the soup closely to make sure it doesn’t boil over and gets too thick.
7. Can I freeze the Oreo mug cake?
A fresh experience brings out the cake’s optimal texture and taste. Freezing it isn’t ideal since it may alter the consistency, but if you want to try, make sure to let it cool completely before wrapping it tightly and freezing it. Reheat in the microwave when ready to eat.
I hope these answers help make your Oreo mug cake experience even better! Feel free to contact us whenever you need more information or suggestions on ways to customize this approach. Happy baking (or microwaving).
Share Your Experience
There are no reviews yet. Be the first one to write one.